
12 Common Property Photography Mistakes Businesses Make, and How to Fix Them
Most of them are easy to spot once you know what to look for, and cheaper to fix before the shoot than after it.
Photography and Video · 8 August 2026 · 11 min read
Written by the Biztour team - Google Trusted Photographers since 2013.
Most property photography mistakes have little to do with the camera itself. They come from booking the shoot before the space is ready, rushing on the day, editing too heavily, or leaving the same photos up for years after the space has changed. None of these are expensive to fix, and most of them just need noticing.
The list below covers commercial property as well as homes. Offices, venues, hotels, shops and new developments run into the same problems that estate agents do with real estate photography, and the people looking at the photos judge them the same way, deciding quickly whether the place is worth a visit.
We have photographed offices, hotels, venues, homes and new developments for businesses across London and the UK since 2013, and these are the mistakes we see most often in the photos businesses already have. Each one comes with what to do about it.
- Shooting before the space is finished and styled
- Leaning walls from a camera tilted upwards
- A lens so wide that rooms look bigger than they are
- Dark rooms with windows blown out to white
- Mixed colour from daylight and warm bulbs
- Clutter, cables and personal items left in shot
- Ignoring the exterior, or shooting it in flat light
- Over-editing that makes the place look fake or hides defects
- Too few photos, or too many near-duplicates
- Nothing that shows how the space is laid out
- Inconsistent quality across a multi-location portfolio
- Never updating photos after a refurbishment
Shooting too early
Booking a shoot before a space is properly finished, decorated, or styled, then living with underwhelming photos for years because rebooking feels like a hassle, is a recurring and entirely avoidable mistake. It's worth delaying a shoot by a week to get the space genuinely ready rather than capturing it in a compromised state permanently. Fit-out firms and interior designers face the same call at handover, and our sister studio Architectural Photographer London has a guide to office fit-out photography.
Ready means the building work and snagging are finished, the furniture is in and unwrapped, the signage is up and the space has been cleaned. On new developments it also means the landscaping is planted and the hoardings are down, because a front elevation behind site fencing is hard to use later.
Leaning walls and converging verticals
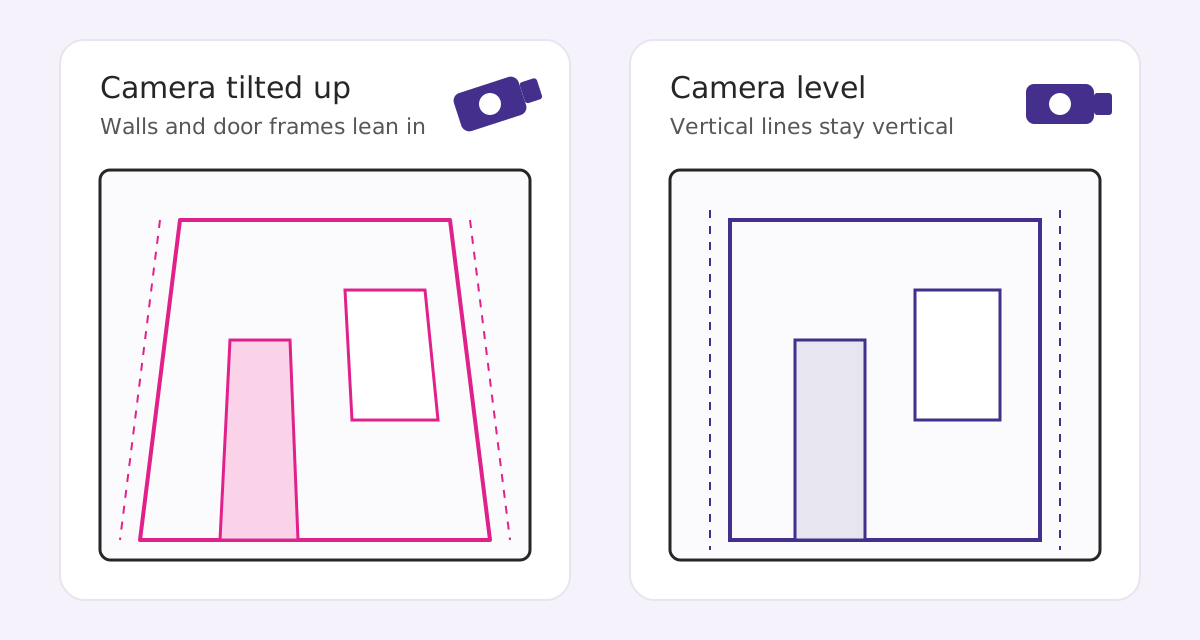
If the camera points up even slightly, the vertical lines in the room lean towards each other at the top of the frame. Walls, door frames and window edges all tilt inwards, and the room looks as if it is falling away from you. It is one of the quickest ways to make a photo look amateur, and it happens all the time with phones, because people hold the phone at eye height and tilt it up to fit the ceiling in.
The fix is to keep the camera level, usually at around chest height on a tripod, and step back or use a wider lens to fit the room in rather than tilting. Architectural photographers also use shift lenses or straighten the verticals in editing, which is fine as long as the correction isn't pushed so far that the room looks stretched.
Using a lens that is too wide
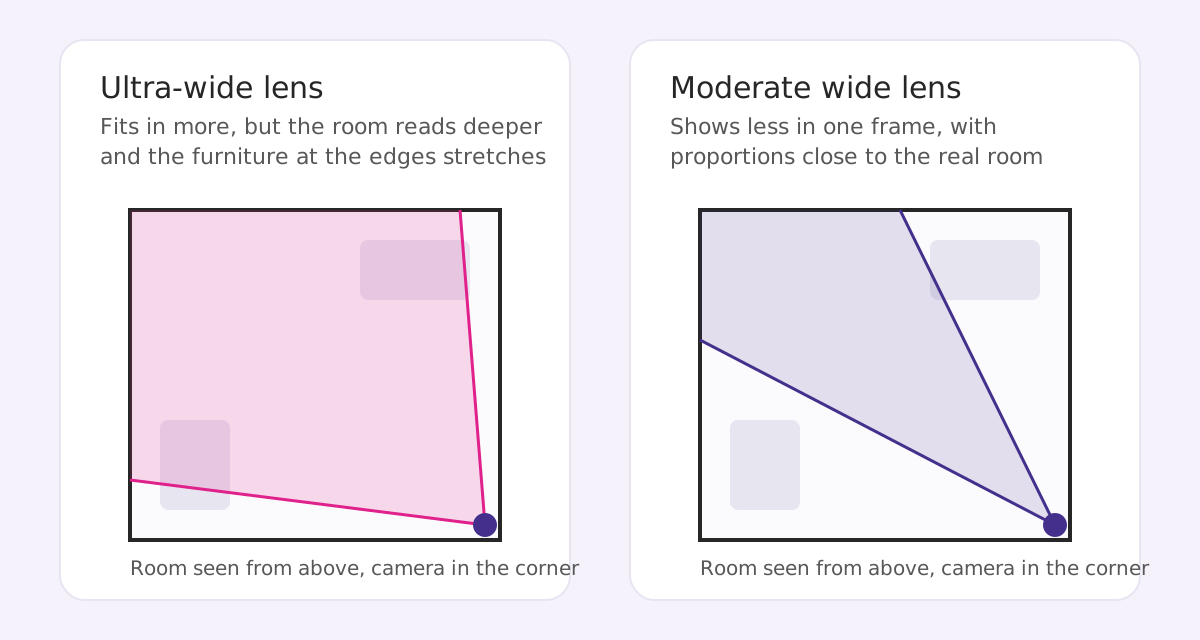
An ultra-wide lens fits a whole small room into one frame, and the temptation is to go as wide as possible so the space looks big. The result stretches anything near the edges of the picture, makes the far wall look further away than it is, and gives a room that looks larger online than it does in person. That gap usually comes out at the viewing, when the buyer, tenant or event planner walks in and finds the room smaller than they expected.
A moderate wide angle shot from a corner shows most rooms honestly. If one frame can't hold the whole room, use two photos from different corners, or let a virtual tour show the room in full 360 degrees without any stretching at the edges.
Dark rooms and blown-out windows
A camera can't see a bright view outside and a darker room inside at the same time in the way your eyes can. If you expose for the room the windows turn into flat white rectangles, and if you expose for the windows the room goes murky. Phones try to sort this out automatically, which is why phone photos of interiors often look grey and flat, with a glow around the window frames.
Professional interior photographers take several exposures of the same frame from a tripod and blend them, so the room and the view both look the way they do in person, and they add light where a room needs it. Before the shoot, turn on every light, replace any dead bulbs and open the blinds to the same height. We go into the technique in how professional photographers light interior spaces, and why professional photography outperforms smartphone photos covers where phones fall short.
Mixed colour from different light sources
Daylight from a window is cool and slightly blue, most indoor bulbs are warm and orange, and some LED panels and older fluorescent tubes have a green tint. When they all light the same room, the walls end up a different colour in each corner and white paint looks dirty or yellow.
Part of the fix happens on site and part in editing. Swap mismatched bulbs before the shoot so each room has one kind of light, and have the photographer set and correct the white balance so that whites look white. If your brand has particular colours in its furniture, carpets or walls, check that they look right in the final images, because a colour cast can shift them noticeably.
Clutter, cables and personal items in shot
Things nobody notices day to day show up badly in a photo. Bins, cables under desks, stacks of paperwork, coats on chairs, mugs, a toilet seat left up and cars parked across the front of the building all pull the eye away from the space and make it look smaller and less cared for. In homes it is usually family photos, fridge magnets and toys.
Walk round the day before with the shot list, clear the surfaces, hide the cables and ask people to move their cars. Our guide on how to style a space before a photoshoot has a room-by-room list of what to put away and what to leave out.
Ignoring the exterior
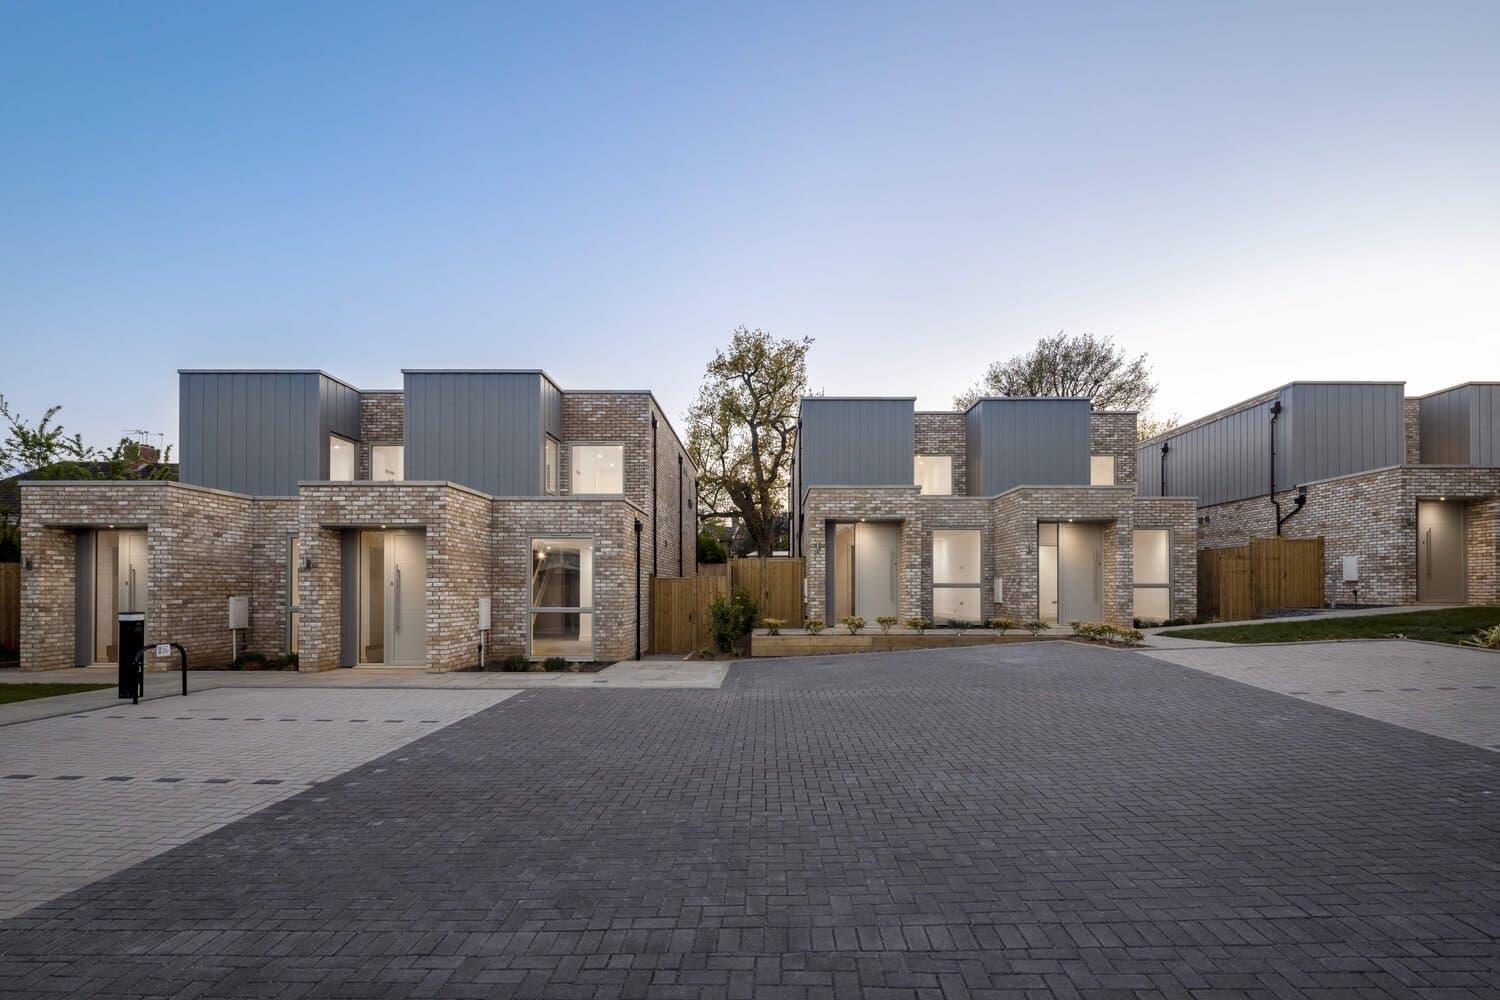
Businesses consistently over-invest in interior photography and under-invest in the exterior, despite the exterior often being the very first thing a customer sees, on Google Maps, on Street View, or simply walking past. A polished interior gallery behind a neglected or badly-lit exterior shot undersells the whole business.
When the exterior is shot matters as much as whether it is shot at all. The same front elevation looks very different in harsh midday sun or under a flat grey sky than it does in soft low light, or at dusk with the lights on inside. Our post on golden hour exterior photography explains how we plan around the light, and for large sites drone and aerial photography shows how a building sits in its setting.
Want this costed for your own space?
Tell us the size of the place and what it is for. You get a written quote, and we aim to reply within 15 minutes in business hours.
Over-editing, and edits that mislead
Heavy HDR, swapped-in blue skies, neon green lawns and colours pushed far beyond what the place looks like all make a property look fake. Visitors notice the difference when they arrive, and it makes them trust the rest of the listing less.
The bigger risk is an edit that changes what is being offered, such as removing a damp patch, a pylon or the building next door, or adding furniture that doesn't come with the property. Estate and letting agents in the UK must not mislead people under consumer protection law, so a listing photo that hides a defect can turn into a complaint rather than a disappointing viewing. Good editing corrects what the camera got wrong, such as colour, exposure and leaning verticals, and leaves the property as it is. Temporary things like a parked van or a wheelie bin can come out, but permanent features stay in.
Too few photos, or too many near-duplicates
A listing with half a dozen photos makes people wonder what the rest of the place looks like. A gallery of sixty, with four angles of the same meeting room, buries the good shots among the weak ones and makes the whole set feel unconsidered.
For most single-site businesses, 15 to 25 well-chosen images cover every distinct area, which is the range we suggest in how many photos a business actually needs. Pick one strong photo for each distinct space, lead with the best one, and put the rest in the order someone would walk through the building.
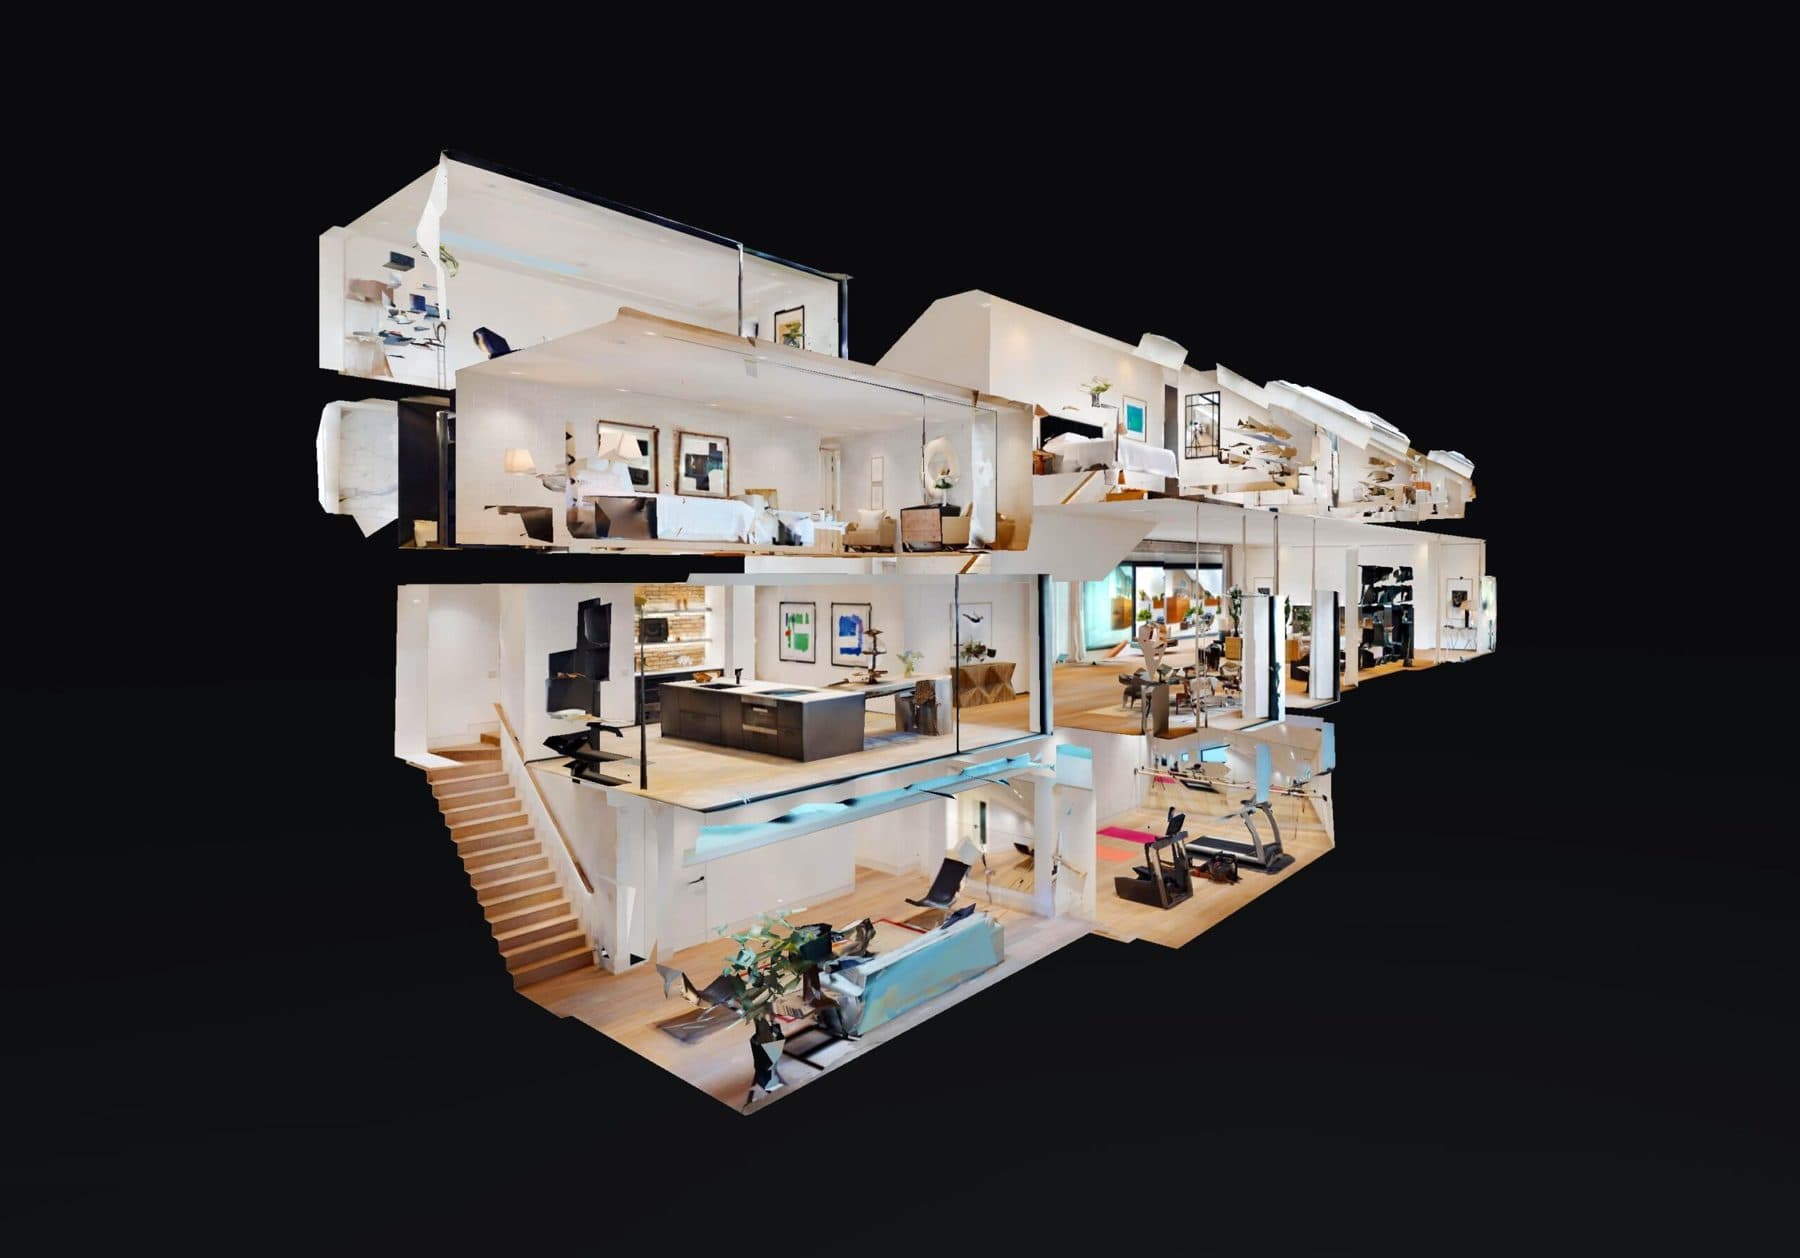
Nothing that shows how the space is laid out
Photos are good at showing what a space looks like and much less good at showing how it fits together. Someone looking at an office floor, a venue or a flat still can't tell where the kitchen sits in relation to the meeting rooms, or how far the bar is from the main hall, so they either book a visit to find out or move on to somewhere that made it clear.
A floor plan answers most of those questions, and a 360 tour answers the rest. A Matterport tour gives a dollhouse view, a floor plan and measurements that are good enough for planning furniture and layouts, from £550 plus VAT. Photography and virtual tours work together, with the photos earning the click and the tour answering the questions that would otherwise need a site visit.
Inconsistency across multiple locations
A multi-site business with one beautifully shot flagship and several sites still running on old phone photos sends a confusing signal: which one actually represents the brand? Consistency across every location, even if it means every site gets slightly less individual attention, builds more trust than one standout and several afterthoughts.
The fix is to shoot every site to one brief, with the same angles, the same editing and, where possible, the same time of day. Booking the sites as one campaign keeps the look consistent and usually brings the cost per site down as well.
Never updating after things change
Photos taken once and never revisited quietly drift out of date as a space is refurbished, rebranded or simply changes over the years, until the listing is actively misleading rather than just slightly dated. Treat photography as something to revisit when the space meaningfully changes, not a one-time task to tick off and forget.
The usual triggers are a refurbishment, new signage or a rebrand, a new layout or change of use, or simply a few years going by. The same applies to a 360 tour, and we cover the timing in how often you should update your virtual tour.
A checklist for the day before the shoot
Most of the mistakes above are avoided before the photographer arrives. Run through this list the day before, and share it with whoever looks after the building on the day.
- Building work, snagging and cleaning finished
- Every bulb working, with matching bulbs in each room
- Blinds open to the same height and curtains tied back
- Bins, cables, paperwork, coats and personal items out of sight
- Cars and vans moved away from the front of the building
- Signage, plants and branded items in place
- A shot list agreed, with the rooms that matter most at the top
- A plan for the exterior, with the time of day and a back-up date if the weather turns
What it costs to get it right first time
Our property photography starts from £650 plus VAT, and our commercial photography covers offices, hotels, venues and other business premises. Photography can be shot on the same visit as a Google virtual tour or a Matterport tour, which saves a second trip. If you send us the size of the space and what the photos are for, we will come back with a written quote.
Questions people ask
How do we know if our current photos have gone stale?
If anyone on your team would hesitate to say 'yes, that's exactly what it looks like now', it's time for an update. A refurbishment, rebrand or a few years passing are all reasonable triggers.
Is it worth professional photography for every single location in a small chain?
Yes, and it's more cost-effective than it sounds when booked as one campaign rather than separate shoots, since consistency across locations is itself part of what builds trust in the brand.
What is the most common property photography mistake?
In our experience it is shooting before the space is ready, because that is the one mistake editing cannot fix. Leaning walls and dark rooms with white windows come close behind, and both are usual signs of photos taken on a phone.
Can bad property photos be fixed in editing?
Some problems can. Colour, exposure, straightening verticals and removing temporary things like a bin or a parked car are routine. A cluttered room, an unfinished space or a photo taken in the wrong light usually can't be fixed convincingly, and those need a reshoot.
Are real estate photography mistakes different for commercial property?
Mostly not. Homes and commercial spaces suffer from the same technical mistakes. Commercial property adds a few of its own, such as uneven quality across several sites, out-of-date branding in shot, and no floor plan or tour to show how a floor or venue is laid out.
Property photography for every kind of business
Over 13 years of shooting means we've worked in almost every kind of space. Find yours to see what a tour does for your industry.
Trusted by














Ready to open your doors 24/7?
Our prices start at £525 and are based on your specific requirements. We aim to respond to all form submissions and email enquiries within 15 minutes during business hours.
5-star rated on Google


